Assignment 5 - Final Project
You can go play it here. The code is available here.
Aesthetic and Technical Intent
I really like the Conway's Game of Life. It is still astounding to me that a simple, completely deterministic system can produce so much complexity. If you are ever bored and suspect you have similar inclinations to me, I recommend checking out LifeWiki. People are still studying this zero-player game and learning more about it. I suppose any system that is Turing-complete could be studied forever, so perhaps it's no surprise!
You might already be familiar with the rules: a cell is born if it has
two neighbors, and stays alive if it has two three neighbors. Otherwise,
it dies. The
rulestring for
this is B3/S23 As you might imagine, there are many
rulestrings you could come up with: 4 9 or 262144 to be
exact. In my version, rule B3/S23 looks like row 3 checked
in the dead column, and 2 and 3 checked in the alive column. So,
Conway's Game of Life is really a small part of the other cellular
automata (or OCA) that
can exist. I have created a tool that allows you to explore this
possibility space in the past. However, this old web toy runs on the
CPU, so I was not able to animate a massive grid in real time. The UI I
originally came up with was somewhat unintuitive as well, so this is
something I wanted to improve on.
I called my new web toy "Games of Lives Maker" but even this is somewhat of a misnomer. It is a tool to create and share any cellular automata where cells are born and die based on the number of alive neighbors in the Moore neighborhood. It covers any OCA that can be defined by the typical B/S rulestring notation.
There are plenty of tools that allow you to run cellular automata. These are parallelized and optimized to a ridiculous degree, no doubt also taking advantage of the GPU. Since tools to study Conway's Game of Life and other cellular automata is well-covered, it doesn't make sense to compete with this by trying to develop a fully-featured suite for studying cellular automata. Therefore, the aesthetic intent of my project is more important. I allow the user to color the simulation in interesting ways. I didn't want to simply wash over the white cells with a crazy pattern arbitrarily; it was important to me that the coloring reflected some aspect of the simulation. Alive cells blend between the "young color" and "old color" as they age. This means that still lifes will fade to one color as they age, which separates them visually from the cells that are constantly in flux. Similarly, dead cells will leave behind a "trail color" which will slowly fade into the "dead color." This post-processing reveals additional patterns that are not apparent with simple 1-bit color. Take this simple black-and-white example with no-gradient for this ruleset. While this looks chaotic and is difficult to watch, add the right colors and moving blobs are revealed. Because I see this toy as more of a creative tool, I wanted people to be able to easily share rulesets and color schemes, so I included the shareable link that puts the colors and rules into a query string at the end of the url. I have probably spent just as much time coding this tool as I have playing with the rules and colors to create some generated art; because of this, I feel as though I have succeeded with my aesthetic intent. I have saved and cropped dozens of pictures to post to social media. I hope people have close to as much fun as I did creating interesting imagery with this tool.
Reaction to Feedback
I shared "Games of Lives Maker" with friends and family. My brother was surprised with the variety of creations you could attain by tweaking the rules and colors. He mentioned that this web toy did a good job of giving a sense of scale, since you could scroll around or zoom out to see all the cells being simulated at once (of which there are over two million.) My friend also had a chance to play with the web toy. He had the idea of including a button that completely randomizes the rules and colors. That way, it would automate the process of randomly changing the parameters in hopes of stumbling across an interesting ruleset. I will probably continue to add features in the future. I also dropped the link on Twitter and got a couple of these: ️❤️ but I didn't get too many comments.
Implementation
One of the challenges was passing the "rules" of the cellular automata
down to the GPU. I encoded the rules as a list of nine integers, and
created a uniform for this. The rule array for Conway's Game of Life
looks like this: [0, 0, 1, 3, 0, 0, 0, 0, 0]. For example,
a cell that has three neighbors would index the third (or fourth, if
counting from one) item in this array, and find rule 3, which indicates
that alive cells should stay alive and dead cells should come to life. I
only pass the rules down to the GPU once they have changed to avoid any
uneccessary communication between the CPU and the GPU. This kind of
works out elegantly, because the pair of checkboxes in the GUI
represents the "rule" number in binary. Unfortunately, you cannot index
an array by a non-constant in WebGL. To get around this, I have to
iterate up to the desired index. I'm sure Khronos had good reason for
this, and I'm sure it's optimization, but annoyingly, this means the
"worst case" scenario is when each cell has eight neighbors. This is
only really annoying from a theoretical perspective, since the
simulation runs smoothly, and this worst case doesn't typically
manifest. (In retrospect, instead of using an array, I could have stored
all of the rules in a single integer uniform, since you only need 18
bits to store the rules. However, this would have made the simulation
shader more complicated, as I would somehow need to extract the rules
from this integer. I wonder if you could "index" a pair of bits in an
integer by dividing and rounding somehow? This would probaby be pretty
fast.)
I avoided dat.gui because I wanted slightly greater control over the UI, both aesthetically and mechanically. This took some time to get right. The main reason for this is that I'm not sure how you might accomplish the "rules table" part of the GUI with dat.gui alone. To keep things simple, I kept all of the GUI stuff in a separate module that gets bundled in the build process.
I originally worked off of the in-class Game of Life tutorial. However, almost all of it had to be rewritten to accomodate for generalized rulesets.
The data for the state of the simulation is stored in a single pixel. The red channel is either 1.0 or 0.0 representing whether the cell is alive or dead. The blue channel is used to store the age of an alive cell, while the green channel is used to store the age of a dead cell. (This is actually somewhat redundant; I could have simply stored the age in one channel, since red already denotes whether the cell is alive or dead. This info could even be reduced to a single channel.) The simulation is not rendered based on these colors, however. The `render.glsl` shader takes these values and uses them to mix between the user defined colors for alive cells and dead cells. I was able to avoid branching in the render shader.
Cool Patterns
I found a bunch of weird rulesets and nice color schemes just by messing around. Click on these links to see some of them. (Remember you can scroll around or change the scale!)
sinking squares
crystalizing mazes
emerging blobs
circuit lakes
reforming mazes
Assignment 4 - Simulation Programming
I chose to implement a rock paper scissors cellular automata that runs on the GPU. Click here to play it. You can find the code here.
Aesthetic Intent
When I was browsing the web for an interactive version of this cellular automata, strangely enough, there were very few examples. Coincidentally, the top result was an implementation by my friend Joe that can not run at full speed in real time because it runs on the CPU. You can play it here. Once a few thousand cells are on the screen, the simulation will run at two frames per second or less. (Joe wrote this almost two years ago so it's not very fair to criticize; the point is that this is the first interactive example that appears when you Google "rock paper scissors cellular automata.") There are not many web-based implementations. You could argue that this form of cellular automata is not really established, as it doesn't even have its own Wikipedia page. Therefore, my implementation probably varies rule-wise compared to others, especially with regard to how fuel is spent per-cell. One thing that is not intuitive about the way this simulation is usually presented is that each cell has a hidden "fuel" value. This is why a single cell won't consume the entire screen, but will instead stop eventually. I wanted to visualize this by representing fuel as the brightness of the cell, making the simulation both easier to understand and more interesting to look at. I also wanted to have a very minimalist UI that could be easily hidden. With the controls, you can place red, green and blue cells, erase cells in a large rectangle, or clear the screen. The goal was not to create a software suite to tweak every variable of this simulation. Instead, I wanted to create a relatively simple web toy using this interesting cellular automata that people do not often discuss alongside the famous cellular automata, such as Conway's Game of Life or Rule 110.
Reaction to Feedback
Nick Krichevsky was kind enough to give me feedback on my project, even though he had already received feedback on his. He mentioned that he liked the concept of cells eating other cells. Nick suggested that I should include a dot underneath the cursor so the user knows what color they have selected. I liked that idea so I implemented that change. Nick also sent me a screenshot displaying a possible bug, where very dark cells (meaning they were nearly out of fuel) consumed an entire field of green cells. I explained that this is actually intended behavior, as eating another cell does not spend fuel, but, expanding to an empty space does. However, this is something to keep in mind, since this kind of behavior might be counterintuitive.
Implementation
In order to get acquainted with glslify, I took Charlie
Robert's game of life tutorial and pulled out the three shaders we used
to run the simulation. I also added type information in jsdoc comments
in order to help myself understand how the front buffer and back buffer
were set up, and what kind of WebGL objects were being passed around. I
built off of this to create my rock paper scissors shader. The fuel each
cell has left is represented by the brightness of the color. This gives
the gradient effect as cells spread out, and keeps things simple because
I can step the simulation solely based on the contents of the buffer,
much like game of life. In order to avoid any floating point errors, I
reduced the fuel of each cell by increments of 1/64, or 0.015625 each
time. One major difference between this simulation and Game of Life is
that psuedo-randomness is used. I modified the
rand function from The Book of Shaders in order to get an
integer from 0 to 7. This choice determines from what direction each
cell will be attacked by. I used branching but I'm sure it's possible to
eliminate this. Even still, I was impressed with how fast the simulation
was able to run. At 1920 by 1080 (the resolution of my second monitor)
2,073,600 cells are being simulated every step!
Mini Project 3 - Reaction Diffusion with GUI
I completed the in-class tutorial and added a GUI, which can be played here.
Mini Project 2 - Cellular Automata
I made the board wrap like a torus. It's hard to tell until you reach a steady state; then you can see evidence of it. I also attempted to make things more visually interesting by using color. The red channel is simply used to tell if the cell is alive or dead. The blue channel grows to 1.0 as the alive cell gets older. Dead cells make the empty cell green, which slowly fades away. This leaves a cool trail for things like gliders. You can see it here.
Mini Project 1 - Feedback
You can access the mini project here.
Assignment 3 - Analog to Digital
Instead of watching the video or reading this, you can play with the shader instead. You can see the GLSL code by viewing the source of that web page, or you can go to this repo.
Aesthetic Intent
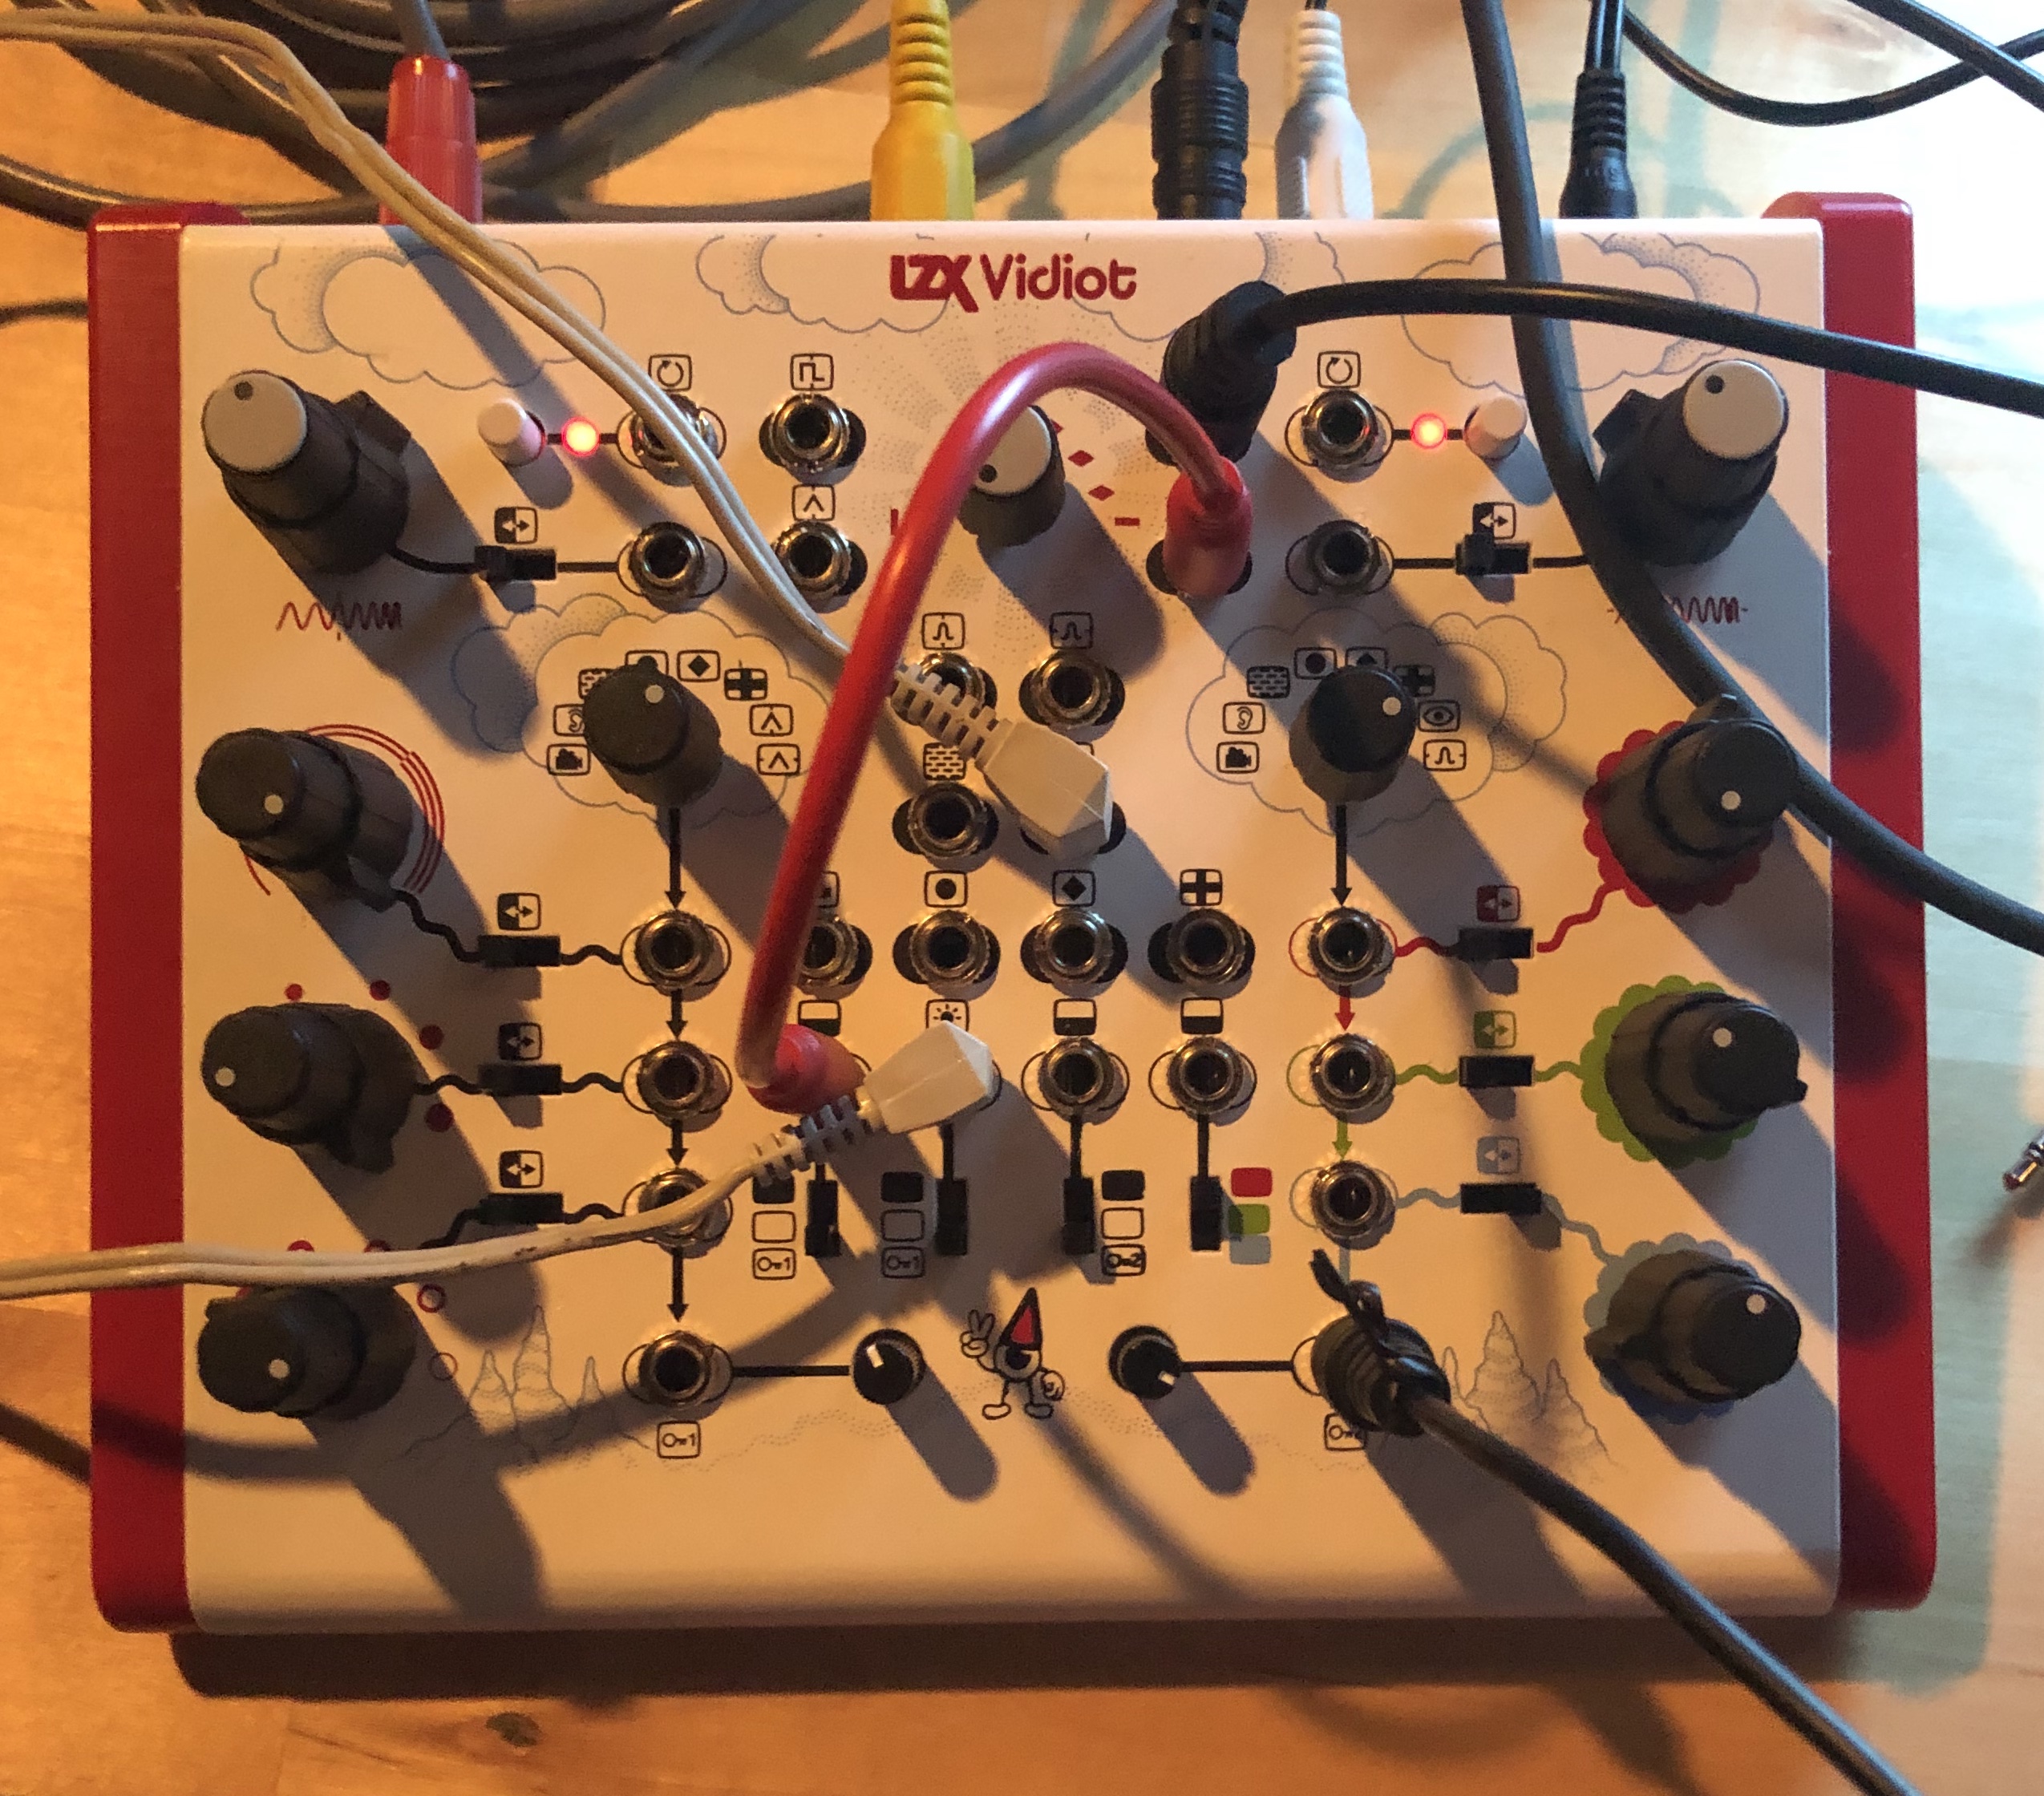
I got to play with the Vidiot, which is an analog video synthesizer. I spent my timeslot in the lab with Alex and Alp. Below are some of the pictures we captured of the video output.
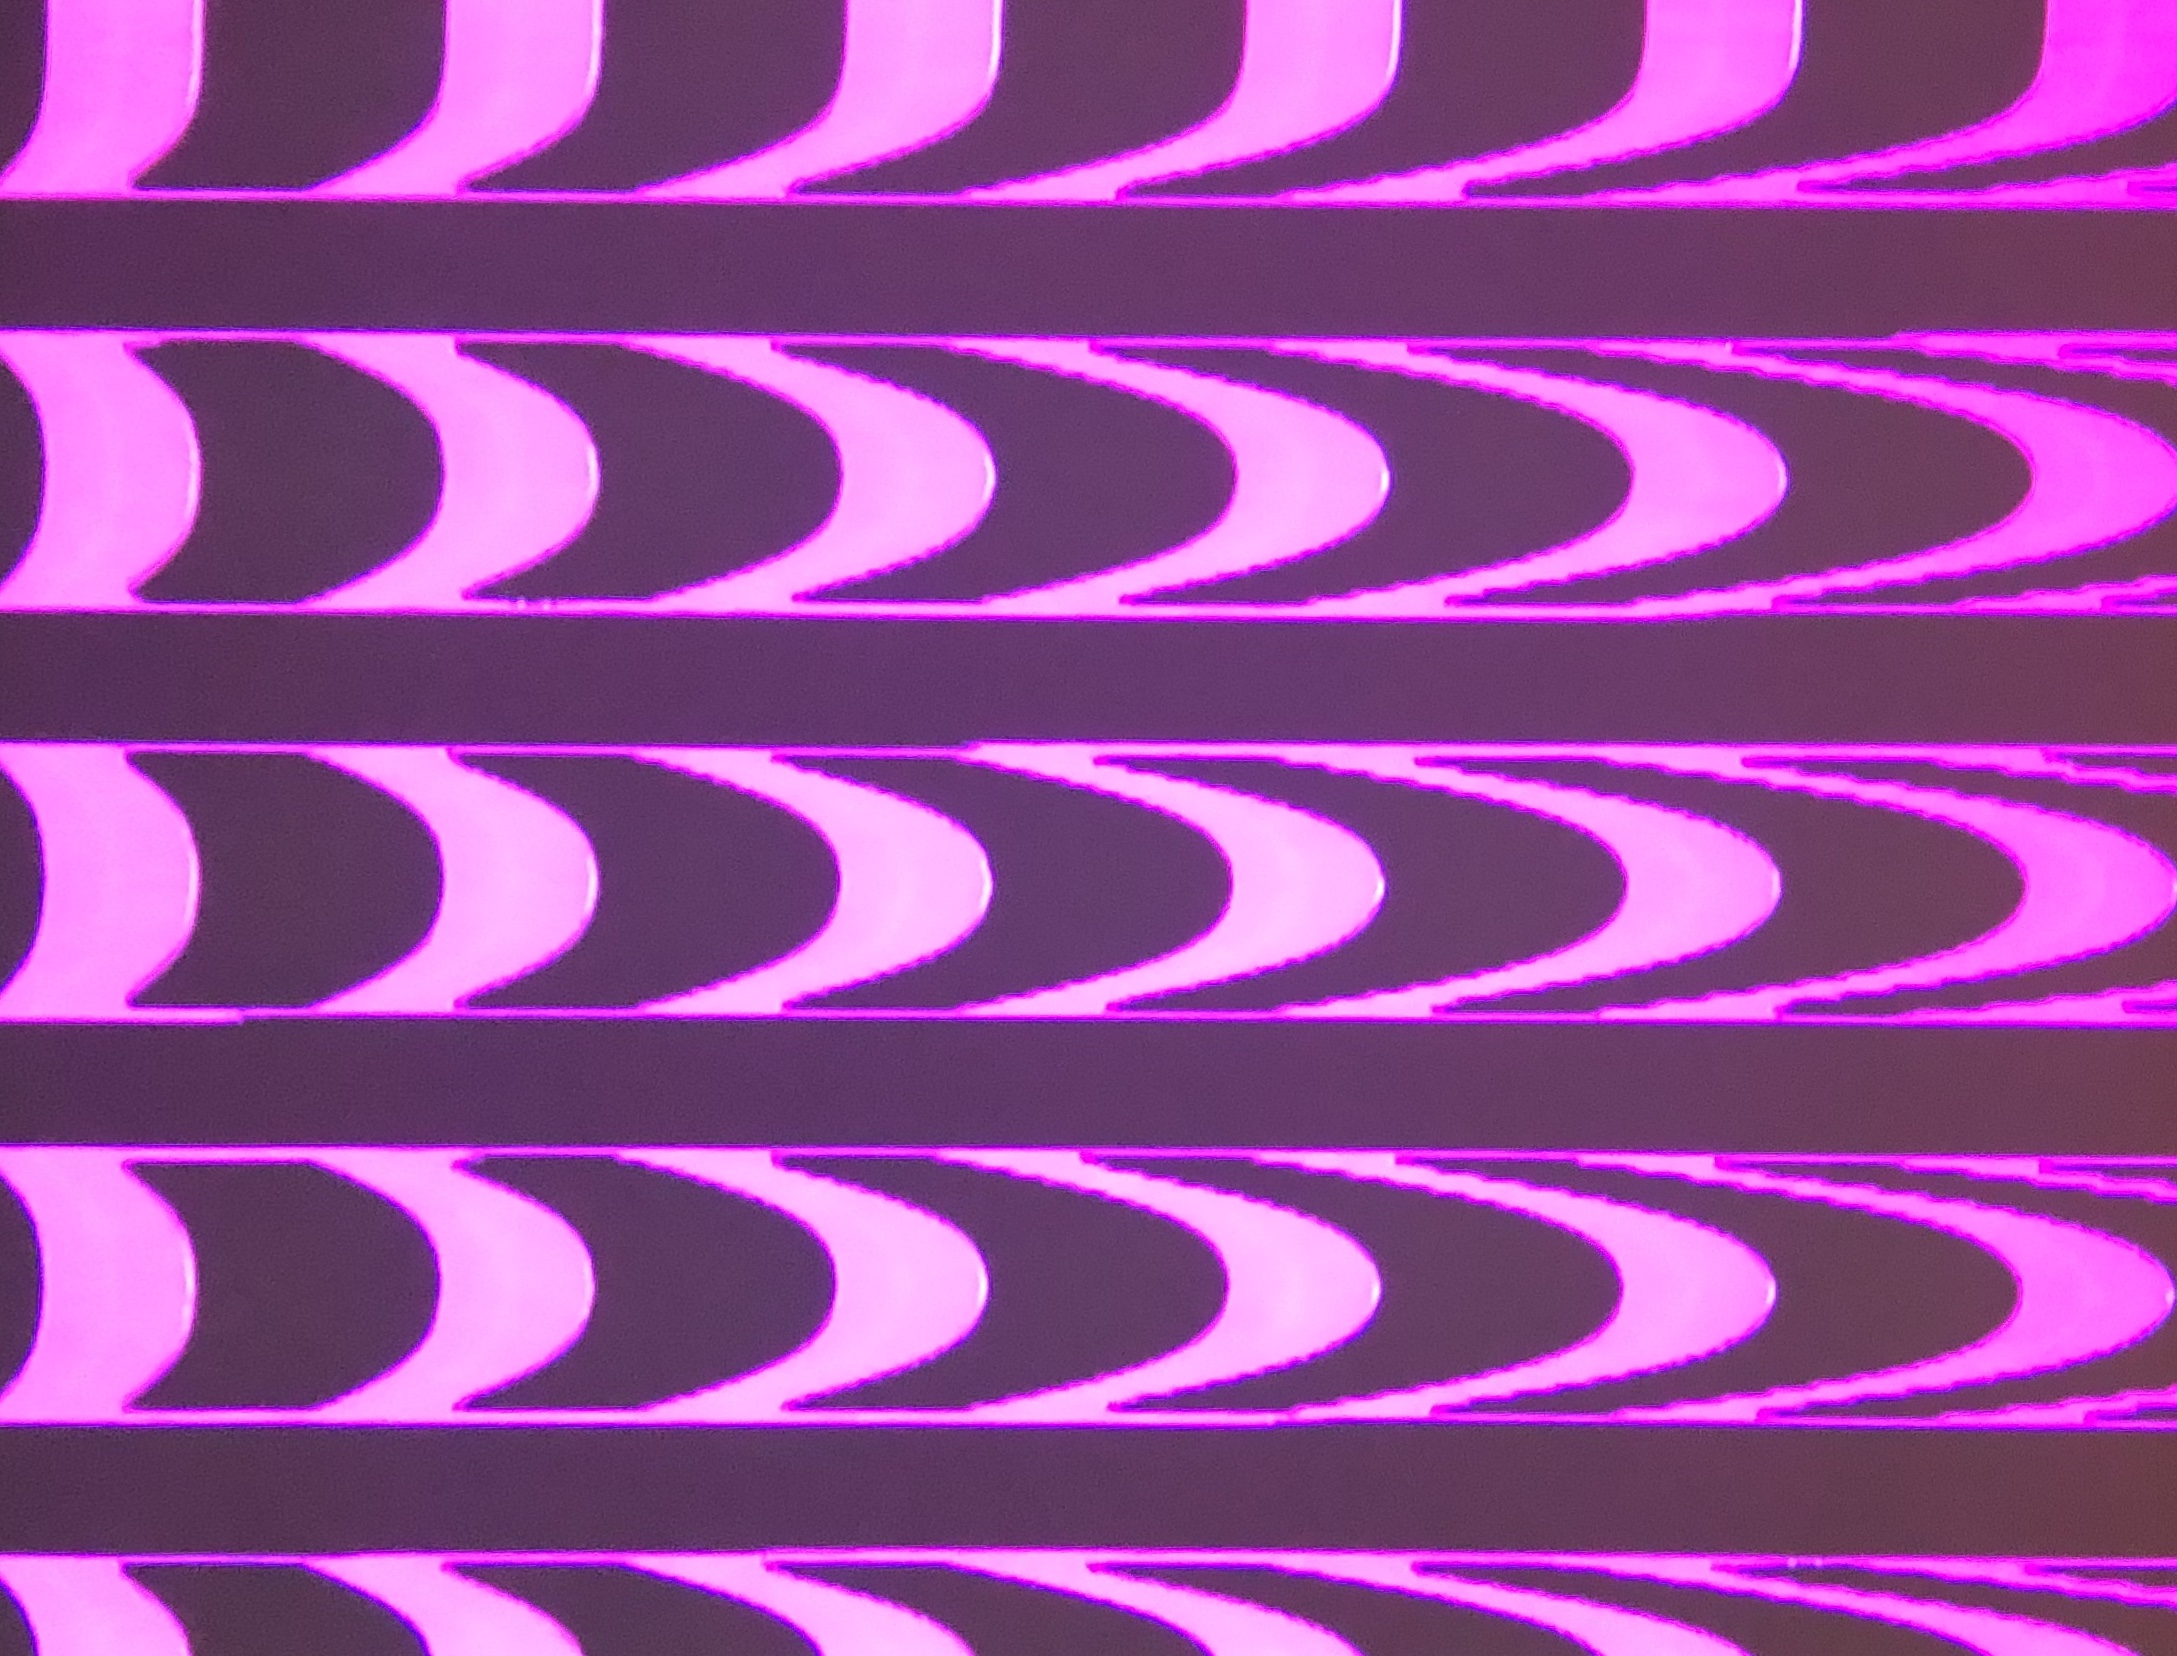
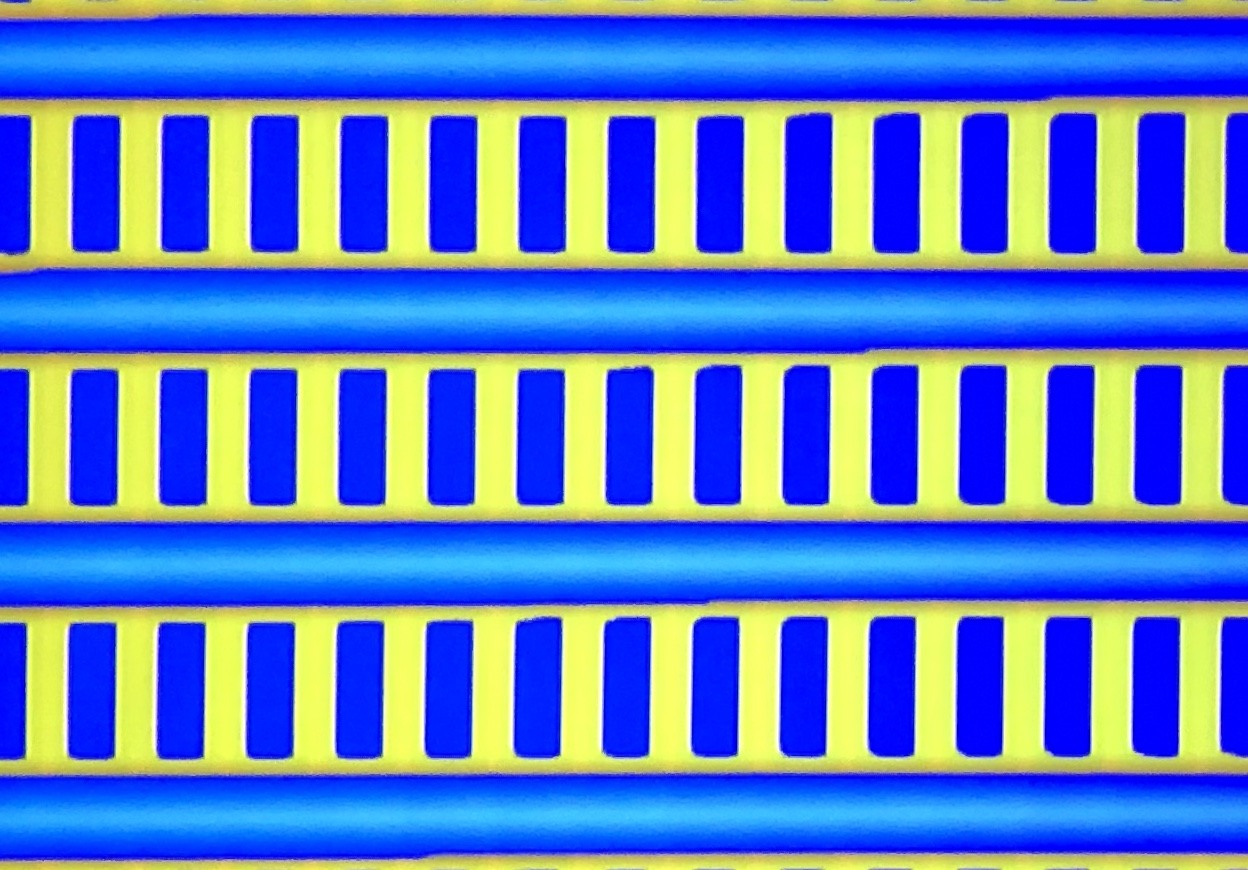

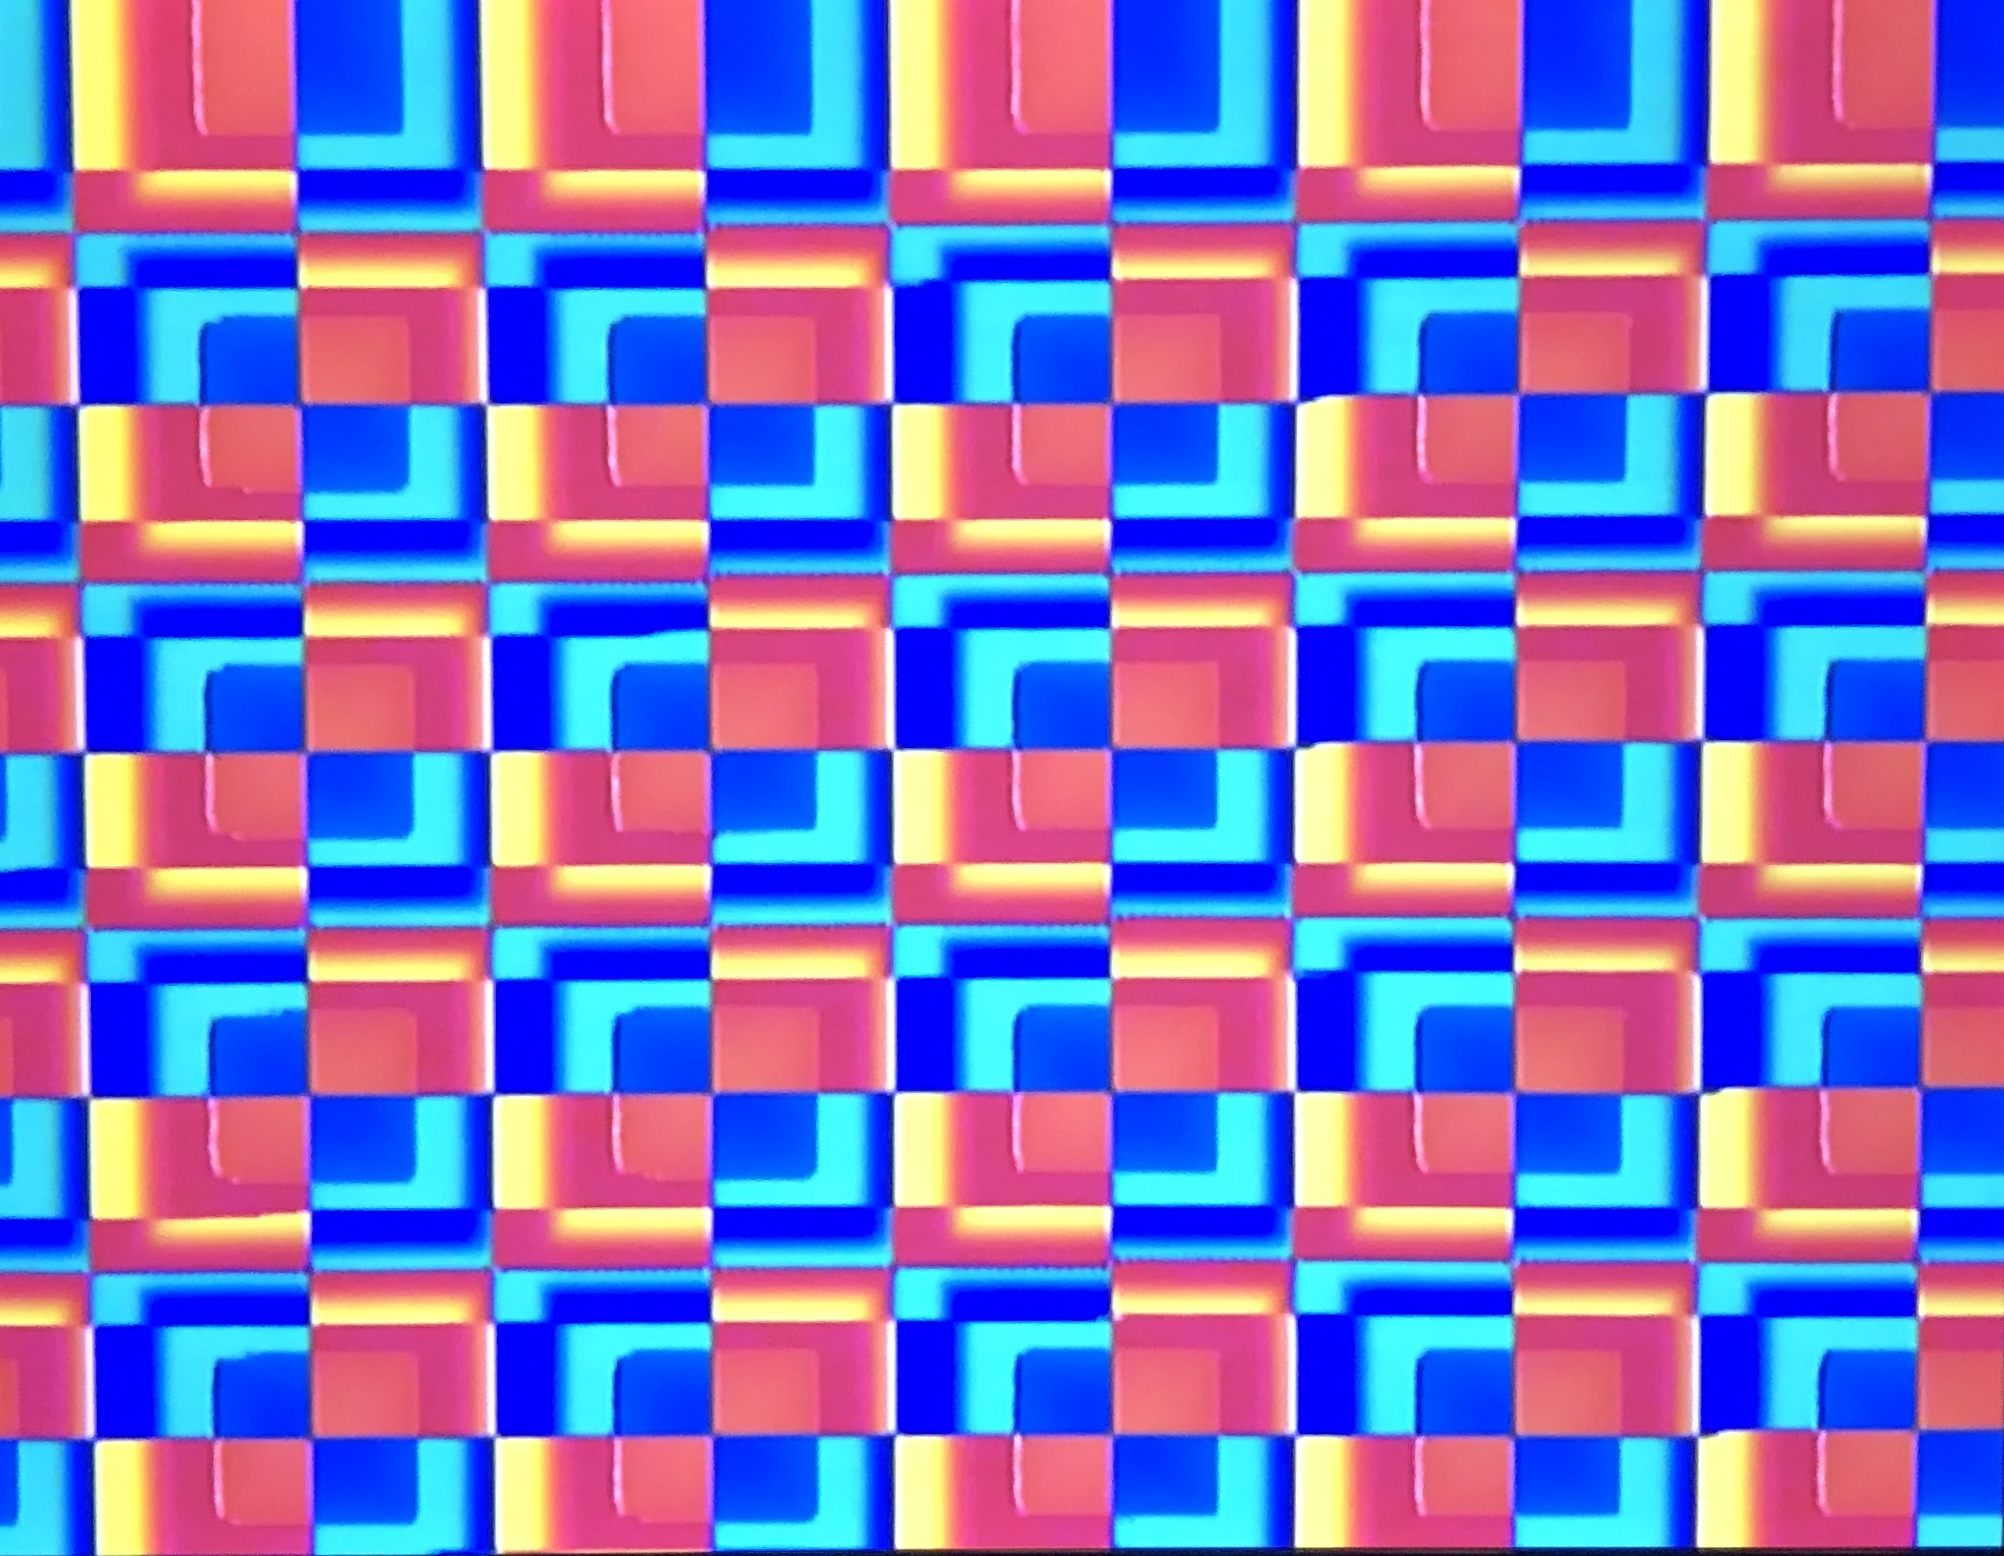
I was particularly inspired by the picture directly above. The color inversions combined with square waves created a complex checkerboard effect. If you want to try to recreate this effect, the patches look something like this:
In designing my shader, my goal was not necessarily to recreate this pattern. Instead, I wanted to play with the idea of creating grid-like patterns by inverting the luma and colors with square waves.
Because part of the joy of playing with the Vidiot involves twiddling the knobs and watching the output in real time, I decided that I wanted to make it easy for someone to manipulate my shader to get new effects. This is why I decided to include sliders on the web page that manipulated various uniforms in the GLSL code.
The square waves allow the user to invert the color and luma of the underlying sin waves. What is nice about this is that complementary colors are always on the screen. It is easier than it might seem to create an aesthetically pleasing color scheme. You can change the frequency of both the sine and square waves in either the x or y direction. I locked these sliders to integers because this makes it easier to line up the wavelengths to create a symmetrical pattern.
There is also a rolling noise effect that is masked off by a triangle wave. You can control the speed and size of this, or get rid of it altogether by zeroing out the sliders. I was inspired by the effect you get when you attempt to film a CRT screen.
Reaction to Feedback
Cem noticed that I was able to recreate some of the vertical and horizontal patterns we achieved while playing with the Vidiot in the lab. He also mentioned that it would be interesting if you were able to create a zooming effect with the sliders.
I was glad to hear that Alex had fun playing around with the sliders to change the pattern. He mentioned that a tool like this could be used to ease a beginner into video synthesizers since the Vidiot can be somewhat unintuitive. I was worried that the tool wouldn't be too limited in regard to customizability to be fun. But, even with the limited amount of parameters he mentioned was able to create a nice variety of images. In fact, he liked simplicity with its focus on square waves and sine waves. Alex mentioned that it would be nice to be able to see the numerical output of the slider, making it easier to save your design. This gave me the idea that this kind of tool might benefit from the ability to download and upload sets of parameters. The feedback I got was great, and I hope I was as helpful to Alex and Cem as they were to me.
Assignment 2 - Shader Live Coding
Goal
My main goal for this shader was to practice using various techniques from the early chapters of The Book of Shaders, such as shaping functions and basic shapes.
Early on, I wrote a function that produced a slanted wave-like effect. I parameterized this function and learned that I could create a variety of distinct effects with it.
I also had a lot of fun using basic shapes to create masks for more complex patterns. I used blurry rectangles to mask off different versions of the wave-like effect, creating a sort of gallery of slightly different framed animations.
By the end of the process, I went for a bright but restricted color scheme using a distance field to create a subtle purple glowing effect. Originally, I intended to only work in monochrome. By the end of the Overlapping the wavy rectangles was the final addition. I discovered the overlapping effect purely by accident. The rectangles start still, and slowly begin to rotate around one another, speeding up over time until the max speed is reached.
Reaction to Feedback
Alex Osner was kind enough to give feedback on my shader. To be honest, I did not think about what mood or theme the animation should convey. At the same time, I was happy to hear my animation gave off an eerie feeling based on the colors and the movement of the shapes. Alex also mentioned that the color choice had a "vaporwave" aesthetic.
Alex also remarked on an optical illusion that was happening due to the movement of the three vertical bars of waves. As the animation progresses, the bars move horizontally out of phase with one another in a sine wave. This gave the effect that the bars were moving in 3D space along a ground plane.
I was pleased that Alex appreciated the repeating theme of three different vertical bars with a similar pattern. Like Alex, I thought one of the most interesting aspects was how the bars blended together while overlapping.
Overall, this type of feedback was excellent. Alex has already given me ideas for techniques I want to experiment with in future shaders. The code for the shader is in this repo in "wave-windows.frag".